Showing posts with label recipe. Show all posts

22 December, 2006

Traditional Swiss Cheese Fondue Recipe

Tesco Chaos
(Scroll down if you are here for the recipe alone ;)

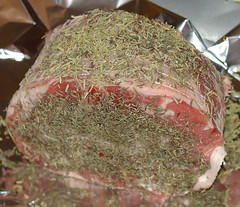
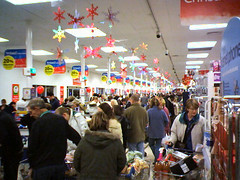
So, perhaps foolishly, we went to finish off the last few bits of Christmas food/drink shopping (£183!!!!!!!), okay, mostly drink, and lots of cheese...got a big bacon joint to cook up too...conditions in Tesco can only be described as "absolute bedlam", a totally chaotic nightmare, I estimate one aisle in three had at least one abandoned trolley clogging it up, tempers were fraying...amazingly though, the shelves were stocked almost as normal, the only thing we couldn't get from our list was a bottle of Malibu (I'll live)...

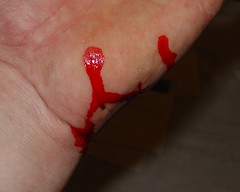
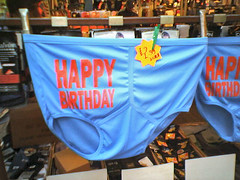
Went from there into Redhill (still loaded down with the shopping), spotted this (which I hope isn't a portent for tomorrow) in the market-
Happy birthday pants
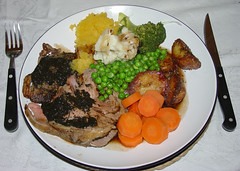
- then home to cook dinner, decided to have my annual naughty Christmas Swiss Cheese Fondue (all to myself as Flyingpops doesn't like it...what a terrible shame... ;)
Swiss Cheese Fondue ;)
Anyway, if you want to enjoy this awesome and very naughty treat (I *do* only have it once a year) you will need the following -

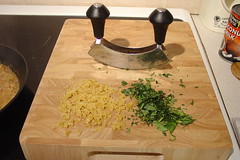
  • A clove of garlic (chopped in half down the middle)
  • Half a pint from a nice bottle of white wine (fruity Hardy's Chardonnay works a treat)
  • A teaspoon of the juice of a lemon
  • A tablespoon of Kirsh (Willisauer is ideal, but any clear cherry liqueur will do)
  • A teaspoon of cornflour
  • 110g/4oz emmental cheese grated (per person)
  • 110g/4oz gruyère cheese grated (per person)
  • Half a French stick (per person)
Procedure -

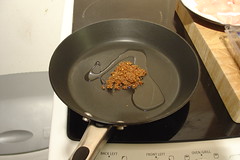
  1. Get a non-stick saucepan (or if you have a cast iron fondue bowl, put that on the hob) and rub the garlic half all over the inside, push hard, get plenty of flavour all over the cooking surface
  2. Put the cornflour into a glass and pour in the Kirsh, mix well, if it doesn't look like you will be able to easily pour it out then add a splash of tap water, mix again and stand next to the hob
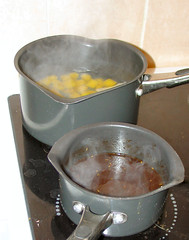
  3. Pour the half a pint of wine into the saucepan and add the lemon juice then bring quickly to the boil
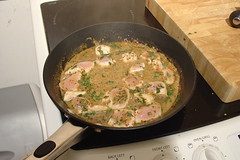
  4. Turn down the heat (a little) and *slowly* add the cheese, stirring *constantly* with a wooden spoon, waiting until each batch is melted before adding more
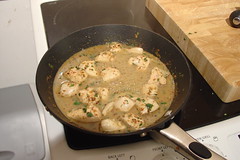
  5. Pour in the Kirsh mixture and stir well (this is when it all comes together!)
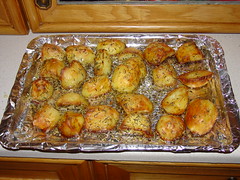
  6. Pour the whole lot into your Fondue bowl, light it up and sit (on the floor) dipping tiny cubes of French stick into the glorious sweet sticky yum sauce, curling up the trails of cheese so as not to make too much of a mess before popping into your mouth, washing it down with much, much more of the wonderful wine...
  7. Fall asleep in front of a Christmas film

31 October, 2006

Spooky green halloween cake recipe

Flyingpops has put on her baking hat (all of a sudden) and now we have cakes coming out of our ears! This one she made last night to celebrate Halloween, a spooky green cake!
Halloween Cake #1
To make it you need the following -

6 ounces of self raising flour
6 ounces of caster sugar
6 ounces of butter
3 eggs
2 teaspoons of green food colouring
1 dash of vanilla essence

  • Beat this lot together into a smooth creamy mixture (Flyingpops used the hand blender with whisk attachment and didn't make *too* much of a mess thanks to careful use of a tea towel, but you can do it with a spoon if you need to)
  • Spread the mixture evenly between two 6 inch, medium depth cake tins which you have lined with a grease-proof paper disk (draw around the bottom of the cake tin onto the paper and cut just inside the line, it will fit perfectly in the bottom)
  • Put into a pre-heated oven (190 Centigrade/Gas mark 5) for between 20-25 minutes (until golden brown)...turn the tins out onto a wire rack and leave them to cool, carefully removing the grease-proof paper disks.
  • Spread your favorite jam onto the base, then sandwich the two together, decorating the top with icing (butter icing with lemon zest is good, but use your imagination) and sprinkles of your choice...


Halloween Cake #2

Spooky green Halloween cake...Done... ;)

13 September, 2006

Traditional Thai chicken red curry recipe

Okay, so harking back to before "the break", I stocked up on all the ingredients required to cook traditional "Gaeng phed kai" or Thai red chicken curry (picture duplicated below for your convenience) having been so inspired by Douglas Chew-
I'm going Thai... ;)
- this was basically all the bits I didn't have in the cupboard or growing on the windowsill/in the garden, namely - Coriander seeds, Fish Sauce, Fermented Shrimp Paste, Coconut Milk, Galangal, some nice fresh dried chillis, some fresh lemon grass and a big old block of palm sugar...without further ado, on to the recipe (it's 2 stage) -

Traditional Thai Red Curry Paste Recipe

1. So, from scratch (the quantities I supply here will be sufficient to make 4 large, spicy servings of any Red Curry, but I happen to like Chicken) grab your mini blender (or pestle and mortar) and put in the following ingredients -

10 Dried red chillies (stalks and all)
7 Cloves of garlic (take the skins off)
1 Inch cube of galangal (dried is fine, in a pinch a similar quantity of fresh ginger might work instead, but I haven't tried it..)
1 Inch of lemon grass (if it's the bottom inch chop the root bit off and throw it away)
half a teaspoon of lime zest ("kaffir" lime if you can get it otherwise ordinary lime will do fine)
5 Black pepper corns
1 Tablespoon of coriander seeds
1 Teaspoon of cumin seeds
2 Teaspoons of fish sauce
1 Generous teaspoon of fermented shrimp paste or "kapi", as it is known (this stuff is STRONG!)

Now, I know this seems like a lot of chillies, but don't worry, this is simply the proportions we need to get the correct basic paste mixture (we decide how hot the final dish is going to be later)-
Traditional Thai Chicken Red Curry #1
2. Whizz it up (or spend 25 minutes grinding (choice is yours)) then immeditately put it into a totally airtight container and pop it in the fridge...
Traditional Thai Chicken Red Curry #2
3. The next thing to do is to wash up your blender (right away) or it may accumulate the same delicate aroma as the paste (you'll know what I mean when you do it), so get it all properly clean now
3. If you have the time, give the paste one nights rest to let the flavours really work into each other ;)
4. (Gordon Ramsay Voice) - Traditional Thai Red Curry Paste - Done... ;)

Note - this paste will keep for a month in the fridge, so you can comfortably make it *well* in advance of the dish itself...one thing though, make the container airtight as I said, if not, well...your milk/cheese (anything in there, in fact, that is sorbant and mild) may not be quite the same again... ;)


Traditional Thai Chicken Red Curry Recipe

1. Okay, so you are now ready to start cooking, ...You'll need the following (for each portion) -

1 Large (or two small) neatly trimmed chicken breasts (cut into bite-sized pieces, get free-range if you can, local free range is ideal)
Half a tin of coconut milk (you can get it in Tesco now)
Half a teaspoon of lime zest, "kaffir" if you can (for bonus points ;)
About ten large leaves of sweet basil (fresh)
2 Tablespoons of fish sauce
1 Inch square chunk of palm sugar
A little splash of vegetable oil
1 Tablespoon of fresh coriander leaves (for the garnish)
Your fresh homemade paste from the fridge

Add - (and this is essential) - Lots of Basmati Rice
(I'll leave the cooking method for that up to the side of your chosen packet though)
Traditional Thai Chicken Red Curry #3
2. Heat up a medium-sized frying pan...Add your dash of oil and between 1 and 3 tablespoons of the red curry paste (bear in mind, one tablespoon is *very spicy*, 3 tablespoons is traditional Thai and will most likely induce a fatal heart attack in anyone unaccustomed to the raw power (start small, you'll still *love* it, and work your way up (next time you cook) if you feel the need)...Fry it fast, keep it moving around so it cooks evenly, and don't let it burn...
Traditional Thai Chicken Red Curry #4
3. While the Curry paste is cooking, quickly shred the basil and crush the palm sugar, now, at the first hint of the fine fragrance (not burning, no black bits please...if you are in any doubt as to when the fragrance is present you can normally tell because all non-curry eaters will now have left the kitchen (if not the house) because of the strong aroma) immediately add the coconut milk and let that simmer until you see oil forming around the edge -
Traditional Thai Chicken Red Curry #5
4. Now, add all of the rest of the ingredients and slow the cooking down to an energetic simmer
Traditional Thai Chicken Red Curry #6
5. Turn your chicken regularly and cook for a couple of minutes (until the chicken is obviously done) the time to this will vary depending on how small you made the chunks, but it's no more than 5 minutes (this is a lightning dish to cook)...
Traditional Thai Chicken Red Curry #7
6. Serve over the rice, make sure you pour all the sauce over too, it's wonderful soaked into the rice, and garnish with a generous handfull of shredded coriander leaves...
Traditional Thai Chicken Red Curry #8
7. Traditional Thai Chicken Red Curry - Done...

Enjoy... ;)

15 February, 2006

Moroccan Lamb Tagine - Update #2

Lamb Tagine #4 - Onion and Spices
Update - Steps 1 and 2 previously posted (as I had some trouble!)...

Okay, cooked this last night but not had a chance to blog it yet, so - when I last left off I'd already ground up all the spices and coated the chunked lamb with half of them (and kept it in the fridge for, well, 2 nights by then)...So, next was two large grated onions (a torture device, my eyes's didn't stop watering! I can chop them without discomfort, but grating...? Ouch...!) plus the remaining spices and three cloves of garlic (crushed) placed on the hob at a really low heat (in the casserole dish)...
Lamb Tagine #5 - Brown the lamb chunks
...meanwhile, the meat from the fridge should be browned off in a hot pan to flash seal on all sides...
Lamb Tagine #6 - Deglaze and combine
...add that to the sweated onions etc. and then deglaze the frying pan with tomato juice...
Lamb Tagine #7 - Throw in the honey, almonds etc
...then combine the lot together with a generous drizzle of runny honey, small handfuls of chopped dates, sultanas and chopped almonds...I also threw in some of the lamb stock from the bone from Sunday's roast...I don't follow recipes exactly... ;)
Lamb Tagine #8 - Oh yeah!
Pop it in the oven at 150 degrees and cook for about two and a half hours (the meat should be extremely tender, if not falling to bits), take it out, chop a large handfull of coriander and parsley and serve with steaming cuscus...it should look something like the above... ;)

...and the verdict....? *Wonderful*! An awesome combination of curry flavours, spices and all that amazing sweetness from the fruit...give it a go! :) Apparently a similar effect can be achieved in a slow cooker by just throwing everything in, but I cannot confirm...I think a bit of frying helps the flavours...

13 February, 2006

Moroccan Lamb Tagine - Update

Lamb Tagine #3
Okay, got the ginger yesterday from my folks, de-boned and diced the lamb, and coated the chunks (2 inch-ish chunks) in half the spice mix...it went in the fridge before I started on the roast dinner, where it will stay until tonight...smells magnificent! ;)

Update - See the rest of the steps here...!

12 February, 2006

Moroccan Lamb Tagine


Okay, I've made a start...unfortunately I'm scuppered *again*! Looks like this is destined to go wrong...I need *ground* ginger and I only have fresh...have to get some when we nip over to my folks later on...Anyway this is pounded cayenne, pepper corns, paprika, turmeric and cinnamon sticks...

Update - see the next step here...!

11 February, 2006

Curses...

...was just about to start cooking Moroccan lamb tagine for my supper tonight, bought all the bits I needed in Tesco this afternoon and just noticed that the *SECOND* instruction (after "1. Preheat the oven to 150C/300F/Gas2.") is to coat the meat in the spices and leave it overnight! BAH! Guess I'll be having that on Monday instead then (Sunday roast tomorrow)!

Worrall Thompson must have a blooming rubbish oven... >:(

19 January, 2006

Perfect English Roast Dinner...

Cooked Flyingpops a nice birthday dinner last night and just thought I would document it as a "how to"...so, step by step, how to cook the perfect roast dinner (Fink-style)...IMHO, of course... ;) I took the pictures at extremely high resolution, so if you want a close up, click away...you might need to log on to Flickr to see them at full res though... ;)

#1 - Peel 'em and boil 'em
Buy some nice Maris Pipers, peel (with a speed peeler), chop (small, roughly 1.5" randomly shaped chunks, tapering ends work really well, as do thick disks) and boil them for no more than 15 mins with a little salt. You can test that they are ready by poking them with a small knife, if the blade penetrates easily then they are done...
#1 Peel em and boil em
#2 - Strain and distress
Strain the spuds, as shown here, then pop them back in the drained pan and "distress" them - i.e. bang them about a bit (thanks Delia)...this step helps boost the crunch factor later on... ;)
#2 Strain and distress
#3 Heat herbs and oil
Meanwhile heat the oil with shredded rosemary and thyme in the oven (180C) warming for the meat...fresh herbs from the garden if possible...careful as you lift the tray out! ;)
#3 Heat herbs and oil
#4 Pop into the sizzling oil and turn
One by one arrange the spuds on the tray, kitchen tongs are *not* optional here unless your fingers are made of asbestos...gently turn them in the hot, herb oil until each is coated then pop them into the oven...they will need around an hour and a half...
#4 Pop into the sizzling oil and turn
#5 - Add a herb crust to the joint
Get your rolled and trussed joint (boned leg of lamb) and pat it down with more shredded rosemary, thyme and a little mint before popping it in the oven for the minimum cooking time (it should be pink in the middle and juicy, moist and succulent when cooked)...this one took about 70 minutes so it followed the spuds after about twenty minutes...
#5 Add a herb crust
#6 - Don't add a 2cm cut to your palm with a large knife
Stormbringer (my trusty but extremely large/heavy Victorinox blade that I prefer to use for chopping swede) once again gashed me...bah...however it's so sharp I actually didn't notice the cut until the blood dripped onto the work surface! Anyway, speed peel the carrots and parsnips, then chop everything (other veg I chose were cabbage, swede (as I mentioned), cauliflower, leek and brocolli), all this goes into the steamer, carrots and cauliflower on the bottom, cabbage, leek and brocolli in the middle and minted garden peas on the top...this gets turned on for the last twenty minutes (i.e. ten minutes before the meat comes out to rest)...Chopped parsnips join the spuds for around 40 minutes in the oven...
#6 Don't add a 2cm cut to your palm with Stormbringer
#7 - Crispy, and fluffy roasters, fink-style
Remove the meat ten minutes before the spuds are done (if timing is slightly off, don't worry, just turn the oven down just to keep them warm) they will be crunchy on the outside and (because they were sealed by the oil) fluffy on the inside...let the meat "rest" for about ten minutes, then carve generous slices (too much for each person is better than not enough)...
#7 Crispy, and fluffy roasters, fink-style
#8 - Jus and Swede
Red wine jus in the front, a reduction of red wine and deglaze of what was in the bottom of the roasting tin...in the rear, swede (*boiled* for 20 minutes) about to be drained and mashed with butter, cracked black pepper and a little sea salt...
# 8 Jus and Swede
#9 - Assemble components and consume
So here we have it, Flyingpops' birthday dinner is finished (this is actually my plate)... ;) So attach your napkin, pour a glass of chilled wine and tuck in! Bon Apetite!
#9 All Done!