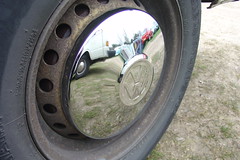
Okay, so as you can see, the nice new chrome hub caps we bought at the Volksworld show (don't pay over about £25 for the whole set of four) did make a
HUGE difference but still look a
little bit pants with the superficial rust on the wheel behind them, so it's time for another
bargain makeover!
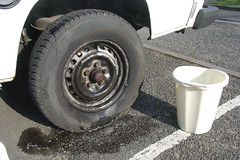
First off, remove as much of the grease as is humanly possible, I found Tesco bleach spray, really hot water and a standard household washing up sponge (the ones with the green abrasive surface for removing kitchen grease) worked perfectly well on this kind of grease (with a little of the elbow variety thrown in for good measure) -
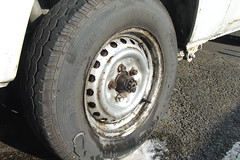
- once done, scour it down with either a scouring pad (from the kitchen), or if you have some, just some wire wool or a wire brush, then rinse and leave everything to dry completely. Now, wipe all the dust and residue from the (hopefully now almost spotless rim) and the first part is complete. Feel free to pop the hubcaps back on if you like, and it will still look great, but follow me onwards for a hard wearing, longer term solution... ;)
Now unfortunately, some expense, homebase's own 1.5" brush will cost you about £1.49 (get the one that says it doesn't drop hairs, as that ruins the gloss finish if you miss one while painting), and (your choice of black or white, both look great on the T25 wheel if you have chrome caps, but black won't show the inevitable dirt) homebase's own high gloss weathercoat cost me £6.99 for a 750ml tin (you won't
need any more than 250ml to do all four wheels, so you can get the small one and get even
more of a bargain makeover...but I had a couple of other little jobs to do that required it) e.g. -
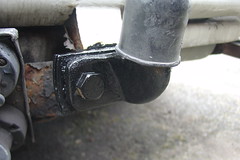
Anyway, assuming there are no spots of rust left (if so, you might want to buy the smallest pot possible of metal primer to just dab onto them before you gloss), working from the top to the bottom (so you can smear out any drips), cover all the bits of the wheel that will remain visible after you put the hub caps back on (obviously you don't want to paint over any of the wheel nuts and bolts, but I didn't need to tell you that, did I? ;)
Oh, and it's funny, but while I was doing this (I had put a rusty BBQ at the end of the parking space just to stop anyone driving straight in and killing me) one of the neighbours, obviously a little confused as to what the BBQ was doing there came to investigate, saw me painting and said "'ello", I looked up and waved and said "Just keeping the old girl (
sorry Colin) going, God bless Weatherseal, eh?", to which he replied "Oh yes, a little R&R"...my confused look perhaps prompted him to correct himself to "Oh, I mean R&M", to which I said "Well, as long as it's not S&M"...(
chortling at my own wit...oh how the winter nights just fly by... ;)
Ahem...*cough*, anyway, back to the bus..painting finished (cheeky banter non essential, and in fact probably best advised against in this instance, on reflection - *cough* *football* *rugby*) -
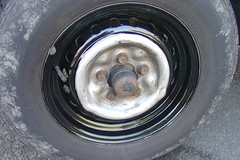
- it should look something like this when done, check back one wheel at a time as you go around painting the others just to check for streaks, and wipe them down with the paint brush (to leave an even, shiny finish), then wait for about 6 hours for the weathercoat to
completely dry (overnight is best) -
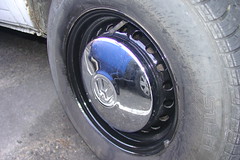
- then pop the hub caps back on (might take a bit more of a wallop than before thanks to the extra layer), and the jobs a goodun'! Bit of "Back to Black" on Colin's boots and (his wheels at least are) show ready for under £9 (or if you need the new chrome caps, £35)! You can't say fairer than that! :)
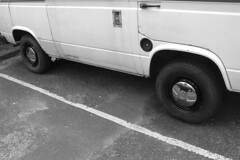
Just need the rest of it up to scratch now!
Bargain headlining next (which will
probably be a disaster) but we shall see, I have a plan...! ;)