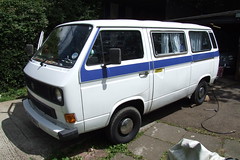
This was actually a few weeks ago now (as you can probably tell by the glorious sunshine in the shots)...poor old Colin the Camper had been suffering with an extremely noisy squeak (squeal/what-have-you) which was obviously linked to the brakes as it stopped when they were applied (for a minute or two), the only problem was that we had absolutely no idea which wheel was to blame (the noise was piercing, intermittent, evasive and didn't happen at low speed)...Anyway, one kind chap we bumped into with Flyingpops' pal Sam to whom we mentioned the problem said that it was 99% likely to be a spring from the rear brakes that had either disintegrated or just popped out of position (leaving one of the pads pressing up against the drum), so, having nothing much else to go on, I bought a new fitting kit (£10 from
Just Kampers), and we popped over to see Uncle and Auntie to see if they could help us diagnose the fault...
We started with the low hanging fruit (the rear ones) first of all find a hard point, then raise the wheel to be inspected off the ground with a jack (Uncle Alan has rather a good one) -
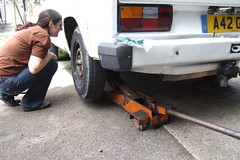
- (oh and that is the bag of springs etc. on the rear bumper)...anyway, remove the hub cap, followed by the wheel nuts -

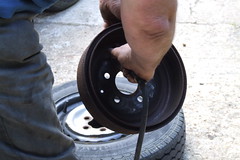
- and put the wheel (and the nuts) somewhere safe...

Next, use a small spanner or socket to carefully remove the drum -

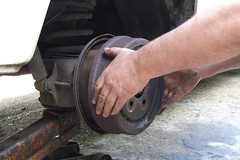
- to reveal the workings...
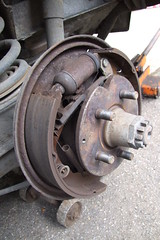
At this stage it's
most important that no-one presses the brake pedal or the whole thing will probably fall to bits! Firstly, inspect the brake shoes and the inside of the drum for obvious signs of uneven wear (also if the shoes are noticeably thin, consider getting them replaced, the ones you see here are perfectly fine), next check for (and remove) any debris (Uncle Alan used his compressed air gun and considerable amounts of brake dust flew out - this can be a cause of odd noises if there is a build-up) -

- do the same with the drum -
- check to see if any of the springs have popped out from where they should be (it's fairly obvious) and if so, pop them back on, using new ones from the service kit if required, but if you replace
one, then replace
all of them on *both* sides of the bus to avoid uneven brakeing (just as you would with tires/pads/anything else involving the wheels) there are enough in the kit to do this...pop everything back together and then test the brakes by setting the wheel spinning (it should spin freely) and then get a friend to push the brake pedal (it should stop the wheel immediately and hold it, but that should go without saying)...now lower the bus and do the other back wheel...Next on to the front brakes, these are disk brakes, so no cover, just pop off the wheel and there you go -
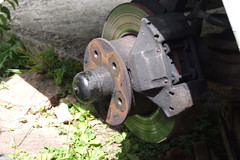
- check the disk itself for pitting (stones and things
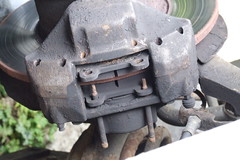
can get caught up as it is exposed to the elements) and look for uneven wear (as before), now get your head over the top of the callipers and check that the two brake pads both jiggle around loosely on the pegs they are hanging off, then get a friend to press the brake pedal and make sure they are both pushed firmly up against the disk. If they do, then the brakes are fine. On our last wheel (typical!) it became apparent that ours didn't.
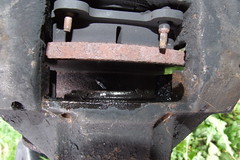
So, this is the process to try and fix the problem, first, remove the two restraining pins (hammer and thin screwdriver do the job perfectly) -

- remove the brake pad -

- and then watch while your assistant pumps the brake pedal to see if the calliper arm extends inside the gap -
- ours extended, but didn't go back when the pedal was released, so, some lubrication (WD40 and some specialist brake lubricant) and a lot of elbow grease (just extend it and then use something to push it back in until it works freely) -
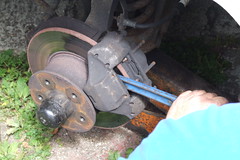
- re-assemble, then check the wheel spins freely and then stops when the pedal is pressed, and then it's time for a test drive!

Squeaking brakes - DONE... ;)